While you can write Schemas by hand and under certain circumstances might want to do so, Mattrbld offers a fully visual way to easily create Schemas. In this article, you’ll learn where your Schemas are stored and how you can create new ones, either by using the editor, or by generating them based on existing pieces of content.
The Schemas Tab
Schemas are stored in your .mattrbld folder alongside the rest of the configuration files of your project. You can access them by heading to the Schemas tab of the project settings.
Here you can create new Schemas by clicking the “Add” button in the top right or edit existing Schemas by clicking them. You may also organise Schemas into different subfolders, which you can also create using the button in the top right.
Be careful when you move or delete Schemas that are currently assigned to content items. You will have to update both content items and Collections once you do to avoid problems.
It might be best to decide on a file structure before you start assigning Schemas to content. In most cases, you won’t have so many Schemas that you would need multiple nested folders, but the option is there in case you do.
When naming folders and Schemas, Mattrbld automatically ensures that only safe characters are used in the actual names through a process referred to as slugification. You can customise how slugs are created as described in the project configuration article. While you are typing a name, you will get a preview of what that name will look like once slugified below the input field. For files, the correct extension will be added automatically.
The Schema Editor
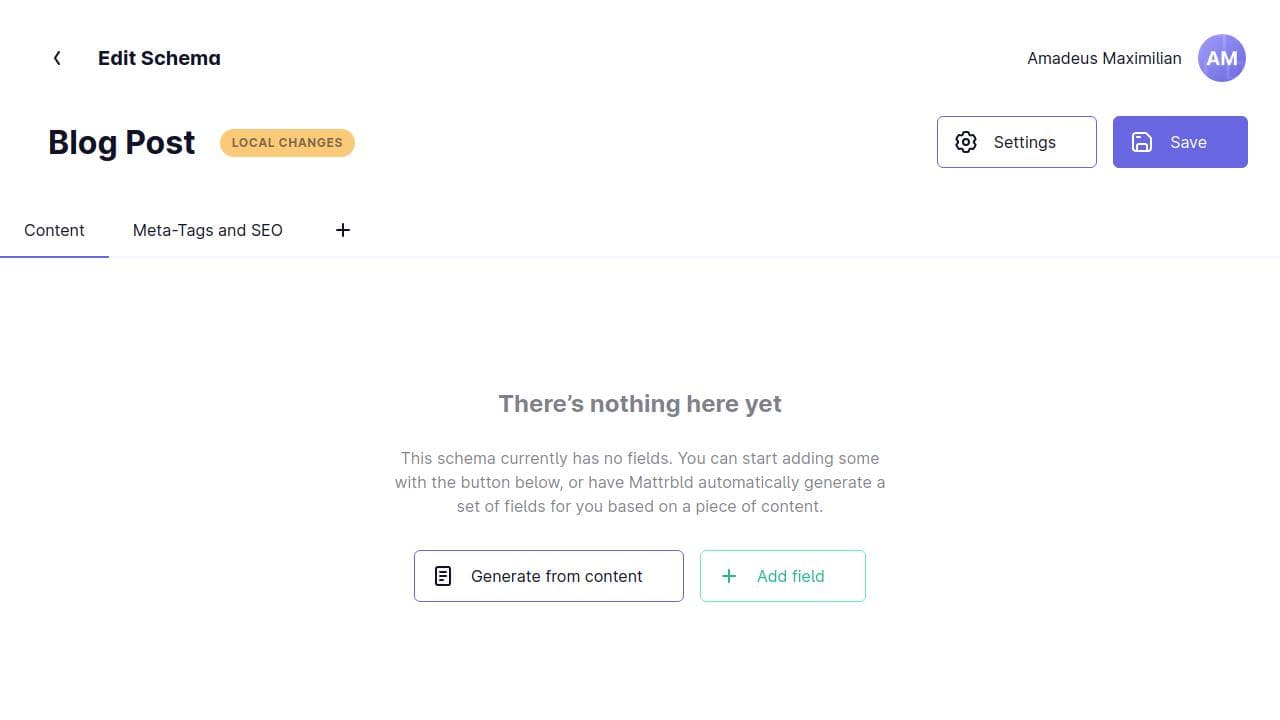
After creating a new Schema, you will be taken to the Schema Editor, where you can either generate a Schema from an existing piece of content, or start building it field by field.

The Editor is structured in three rows:
The information row
The tab-bar
The Schema builder
In the information row you’ll find the name of the Schema, it’s current sync status, as well as two buttons for modifying a Schemas settings and saving your changes.
Below that is the tab bar, which only houses a single “Untitled Tab” by default. You can change its label and groupAs properties by right-clicking (or long pressing on a touchscreen) it and selecting “Edit” from the context menu. Clicking the little “plus” icon will open a modal allowing you to add a brand new tab.
Tabs can also be rearranged, added and modified via the Schema settings, which can be opened by clicking the “Settings” button in the information row.
Below the tabs is the Schema builder, which always shows the fields for the current tab, or an empty state in case there are no fields yet. From here you can either opt to generate a Schema or start adding fields by clicking the respective buttons.
Generate from Existing Content
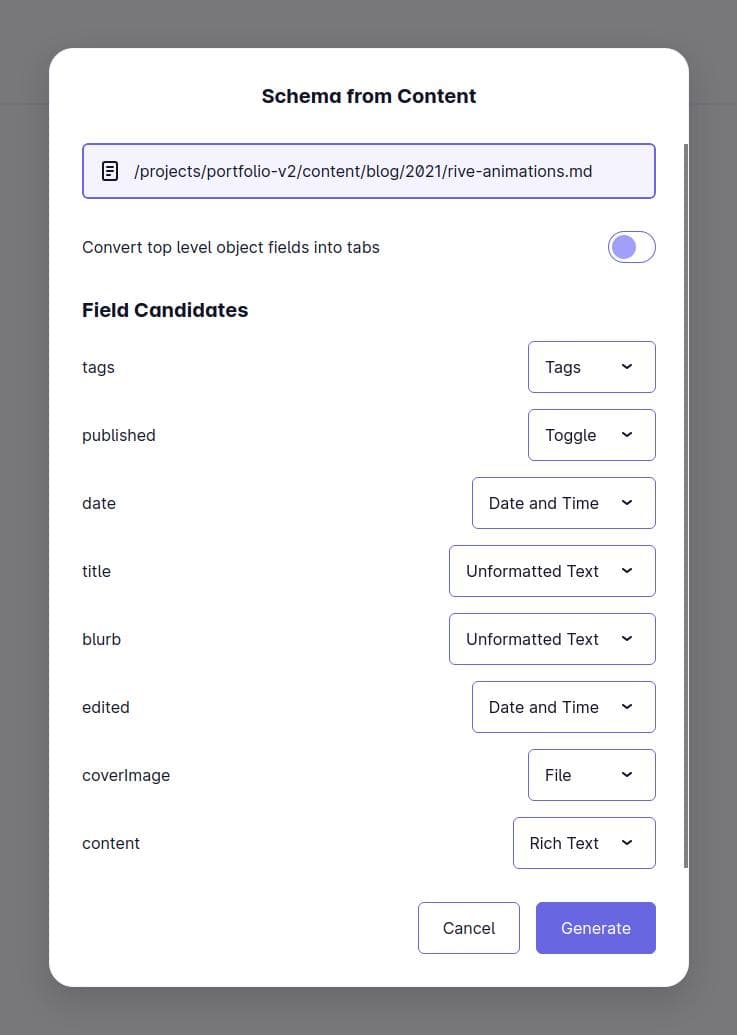
If you have some existing pieces of content, for example because you’re adding Mattrbld to an existing project, or because you are switching from another Git-based headless CMS, click on the “Generate from content” button. This will open a modal which will allow you to select an existing piece of content and scaffold a Schema based on that.
Once you’ve selected a content item, you will see a preview of the fields Mattrbld identified and what types it inferred for them based on the content. If it guessed wrong, you can use the drop down menus to adjust the field type.

You also have the option to convert top level fields that are objects, i.e. just group multiple other fields, into tabs by activating the toggle below the file selector before clicking “Generate”.
Clicking that button will populate the Schema with the specified fields and their respective types, as well as correctly set up their keys, providing you an excellent starting point for further configuration. Since the Schema is fully editable after being generated, you have nothing to lose by generating it from content, which can save you a lot of time.
Building a Schema by Hand
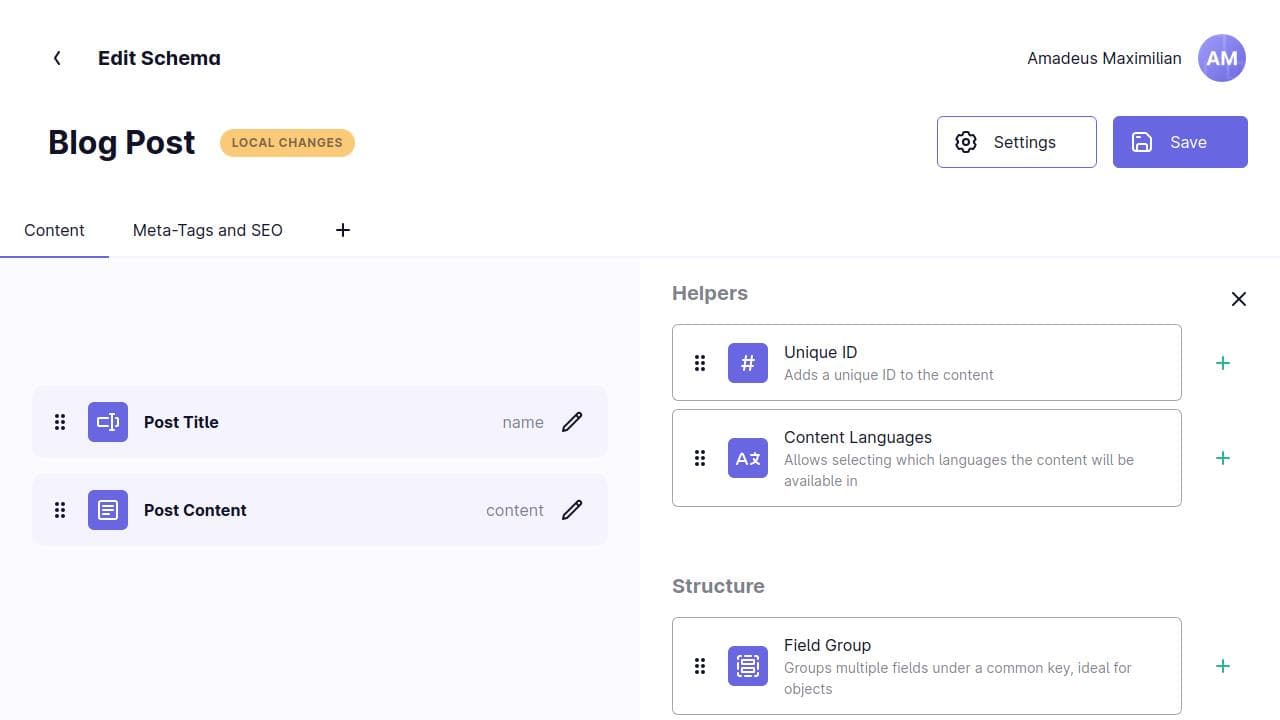
If you’d rather have more control, or simply don’t have any existing content yet, you can build your Schema field by field. To do so, simply click the “Add field” button instead. This will open a panel to the right (or an overlay on smaller screens), allowing you to start adding fields to your Schema by either dragging them or by clicking the little “plus” icons next to them.

Fields in this panel are grouped into different categories and can be filtered by either typing a category or field type in the search bar at the top. To help you find the right field for the job, each of them also comes with a short description of its function and a unique icon.
While you can add and configure each field one by one, it’s often more practical to quickly add all of the fields you know you’ll need and then proceed to configure and rearrange them afterwards.
Some fields, such as Field Group fields, allow for other fields to be nested under them. You can freely nest fields by simply dragging and dropping them. The same is true for changing their order, of course.
You can also quickly move a field to another tab by dropping it on the respective tab. If you’d like to delete a field, simply right-click it and select “Delete” or use the “Delete field” button in its configuration options.
Configuring Fields
Once a field was added to the Schema builder, it can be clicked to be edited. This will open the side panel and display the field’s options, such as visibility, validation and more, which will be further discussed in their own article. Should any configuration be invalid, for example because of a missing field key, the field will be flagged as erroneous and you won’t be able to save your changes until you fix the error.
Previewing Fields
Every field that supports a default value will allow you to set it near the top of its configuration options. The field you see there reflects most of the configuration options you set on it.
If you would like to get a full preview of what your Schema will look like to Content Editors, as well as a glimpse at the data structure of content with that Schema assigned to it, simply click the “Preview” button at the top of the Schema Editor.
Saving Your Changes
Once you’re happy with your Schema, you can save your changes by clicking the “Save” button in the top right. This will write your changes into the virtual file system and make them ready to be synced to the central repository, so remember to always save! While Mattrbld will try its best to warn you if you’re about to lose changes by either navigating away or closing the application, it’s not always possible, especially on mobile devices.
Schema Settings
As mentioned before, the Schema settings, accessible via the “Settings” button in the top right, house a way for you to rearrange and edit the Schema’s tabs via drag-and-drop. Here you can also rename the Schema, should you need to do that while editing it. Otherwise, renaming and moving can also be accomplished from the Schemas tab in the project settings.
Congratulations! 🎉 You have just created your very first Schema! In the next article you’ll learn a bit more about how Schemas help you ensure that your data always has the expected format and Content Editors can’t accidentally make invalid inputs through the use of validation.
