I can’t believe it has been two weeks again already, time sure flies like the wind these days. So without further ado, welcome to today’s Mattrbld devlog!
As the project matures, there are fewer and fewer large-scale changes, but nonetheless I have a couple of new features and improvements I would like to present to you today. But first, let’s recap where we left off two weeks ago.
A Quick Recap
In the last devlog, I showed you the brand new project dashboard, which serves as a central welcome screen and communication hub for all members of a project to keep up to date with what’s been happening.
The second big feature was the real-time preview, which allows content editors to see what the content they’re working on will look like once published, among other things. With that, it should be much easier for non-technical collaborators to be able to connect the abstract representation of content within Mattrbld with its real counterpart in the published medium, be that a website, an app, or whatever else.
What’s Happened Since
As announced two weeks ago, I spent the better part of my time implementing the last two major missing features: custom fields and invite links, which lead to a couple more improvements, as you’ll see below.
Custom Fields
Easily the biggest new addition were the custom fields and the UI to manage them. To recap, content in Mattrbld is assigned a Schema, which consists of a list of fields for each property the content has.
Mattrbld comes with a large selection of configurable default fields out of the box, which can be used to model just about any form of content. However, large Schemas can get quite unwieldy, especially when dealing with a lot of nested group-fields. On top of that, since every field carries its own set of distinct options, it’s easy to accidentally misconfigure a field that should show up with the same options in different places of the same Schema or multiple Schemas.
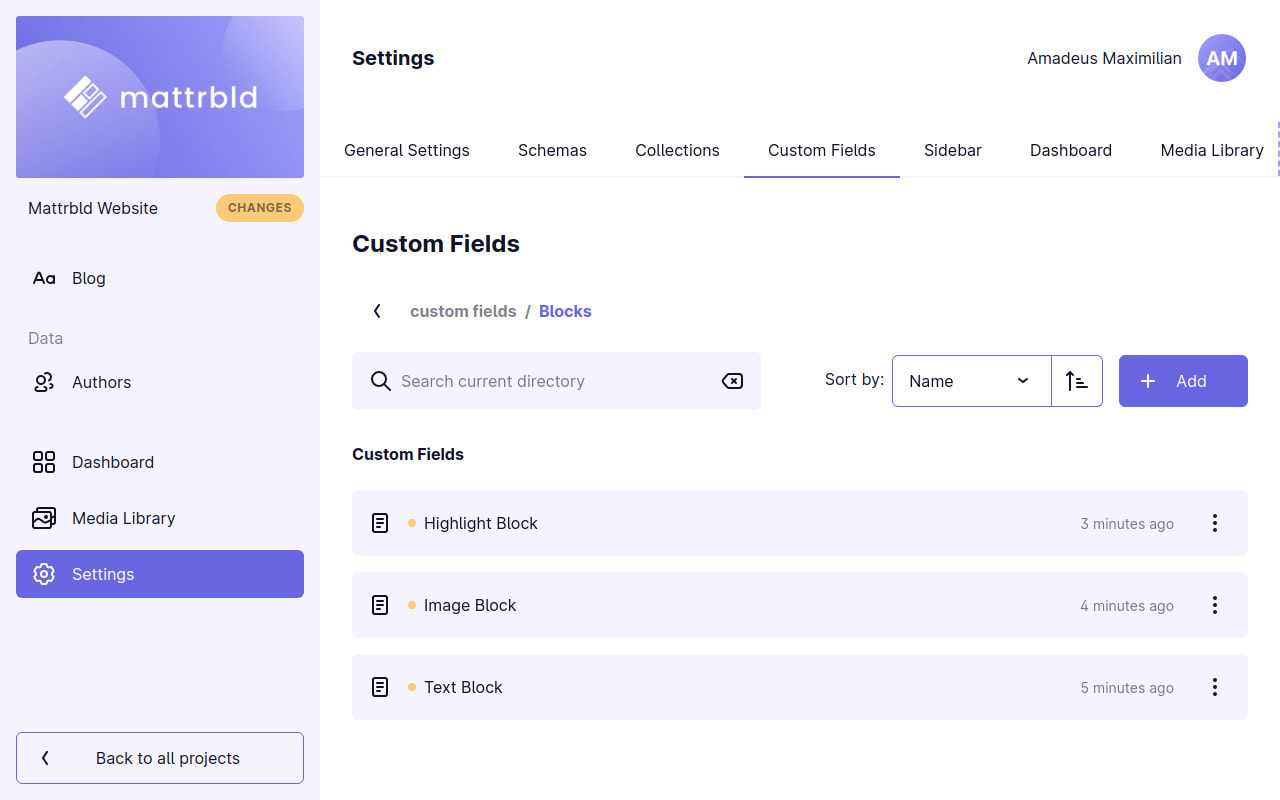
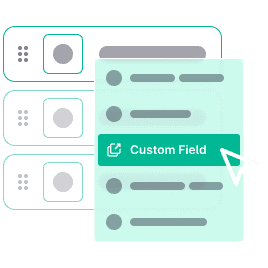
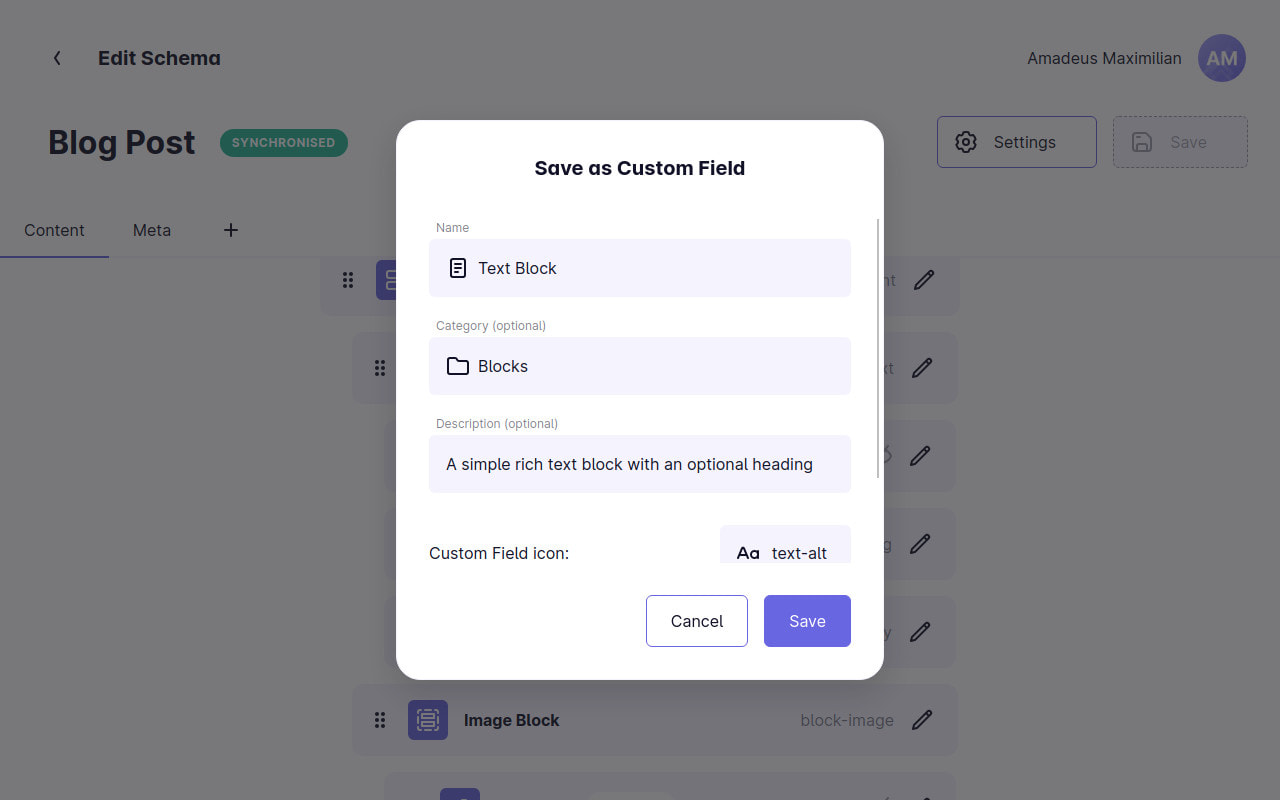
Custom Fields solve this problem. At their core, they are pre-configured default fields that can be managed from a central location. For example, the Rich-Text field allows outputting both HTML and Markdown and offers a large amount of customisation options to shape that content. Developers can pre-configure such a field to output Markdown and configure what formatting options should be available, then save it as a custom “Markdown-Editor field” complete with its own description, category, and icon, so it can be more easily added to different parts of the same or even multiple Schemas.
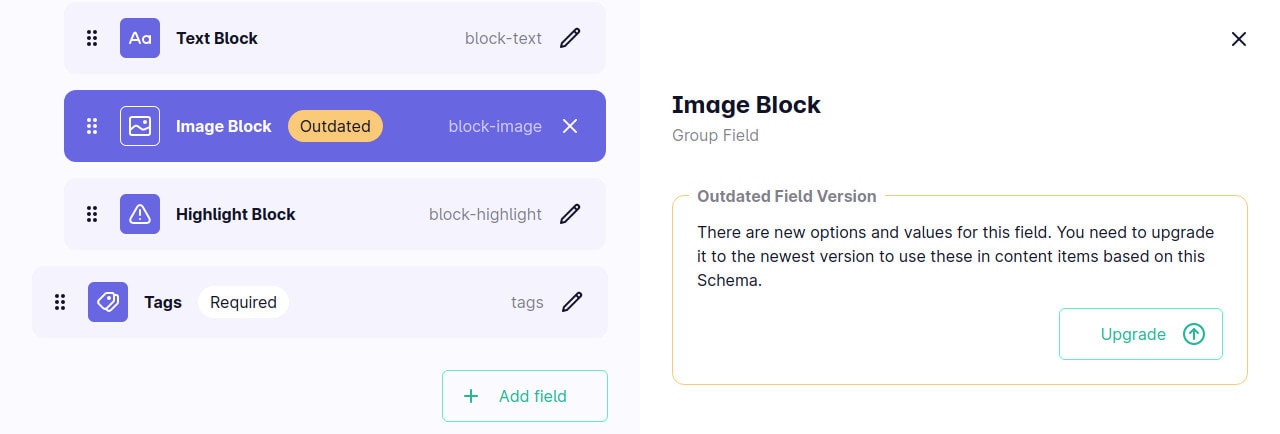
Should a new requirement for this particular field come up, the new options can just be set in the central Markdown-Editor field once and then be propagated to the Schemas that make use of it—when they’re ready to be upgraded.
Like default fields, custom fields are versioned, meaning that if the original custom field changes, instances of that field will show that they can be upgraded, but won’t be upgraded automatically. This leaves the developer in control of which fields conform to a new version and which stick to an older one for compatibility.
Another use-case for custom fields is the concept of reusable content “blocks”. These blocks are essentially groups of predefined fields which can be added to a Rows or Columns field in different combinations and orders.
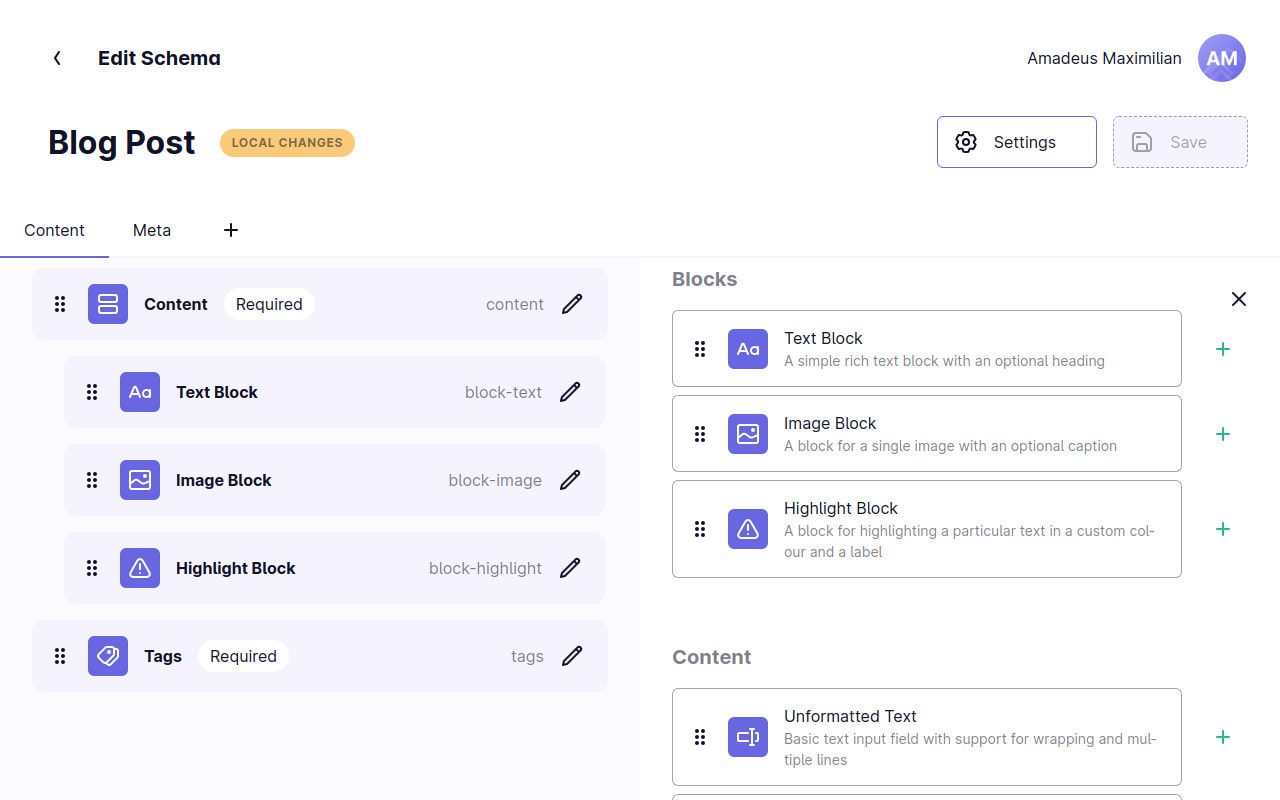
If these blocks are defined as custom fields, they can be re-used multiple times throughout different Schemas, while at the same time not unnecessarily cluttering up the Schema Editor.
Schema Editing Improvements
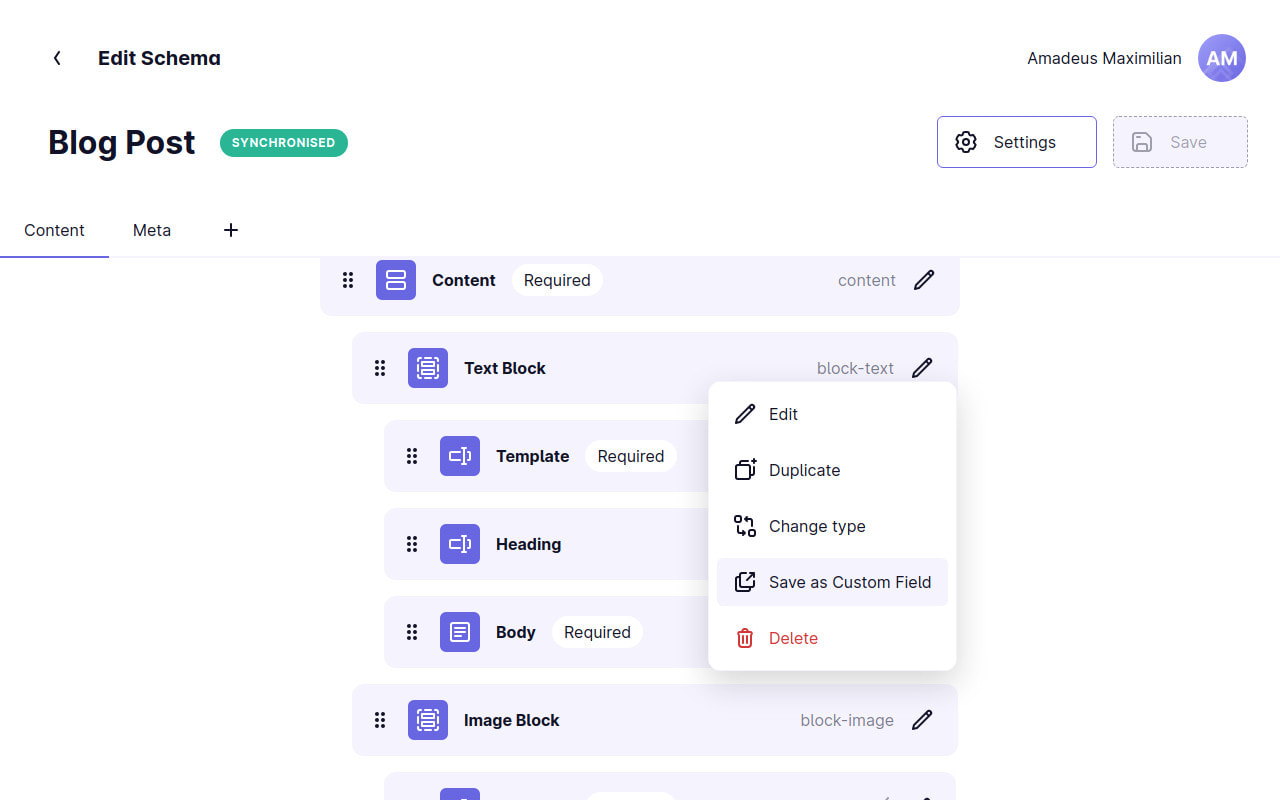
Speaking of which, while implementing custom fields, I made it possible to convert existing fields in Schemas to custom fields, as it is common to set up a Schema and then only afterwards realising that some of its fields should be reusable in different places.
In addition to that, I was also able to make the Schema editing experience a bit more intuitive by allowing fields to simply be dragged to a different tab in order to move them there. This matches what users have learned from tabbed file pickers and other applications on their devices. Of course it’s still possible to change the tab of a field through its options just as easily.
Last but not least, I also added the option to change the type of a field to a different one while retaining options that are compatible. This can be very useful for Schemas generated from content items, or for example when changing a Radio-Group field to a Dropdown field because the number of available options grew.
Invite Links
The User Settings tab in the options of a project has long been able to generate an invite link for any user that was added to a project, but using such a link would always lead to a 404-error because the corresponding functionality had not yet been added to Mattrbld—until now.
In addition to gaining two additional properties (the name of the project and the person who invited the user), invite links now take users to a special route that allows them to review the options encoded in the invite link and supply any missing ones. Once the data is correct, the project they were invited to can be imported to their device with one click—regardless of whether or not they used Mattrbld on that device before or not.
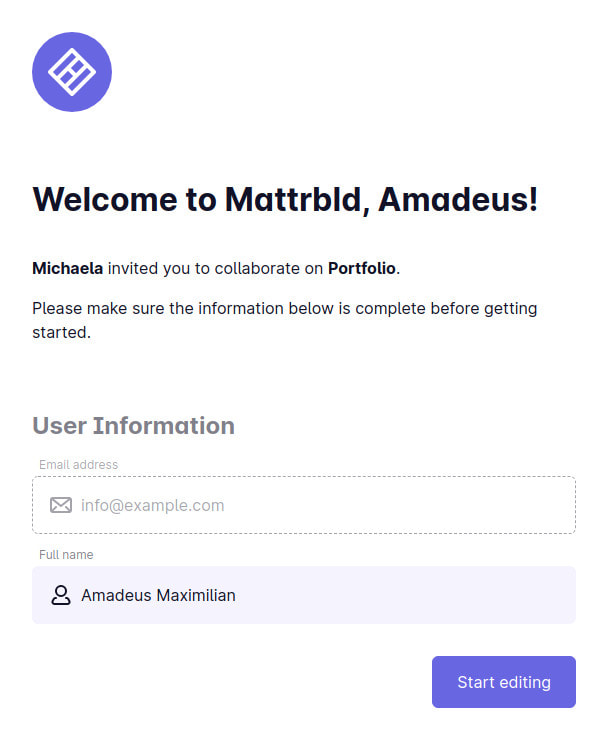
This means that it’s also an easy way for existing users to quickly set up Mattrbld on a different device by simply sending themselves the invite links of the projects they would like to work on on that particular device. Since these links are so flexible, they could also be turned into a QR-code and used internally to quickly onboard new team members to a project without having to manually invite them every time.
More Reliable Field Version Upgrades
While implementing custom fields, I stumbled over a couple inconsistencies with the existing field upgrading logic, which I was able to improve and thus make more reliable. Changing options are a tricky situation, especially with the introduction of custom fields, so there might be a couple more bugs cropping up as people start using these features more extensively with their own custom setups.
A First Testing Instance
As the technical side of the project is getting to a testable state and my university requested to use Mattrbld for an upcoming website, I spent some time last week setting up an internal testing instance. While setting up Mattrbld itself was a breeze (it’s just a static website after all), there was still the issue that the CORS configuration of major Git providers doesn’t allow cloning and pushing from a browser.
Instead of hosting a separate proxy server (since my uni’s resources are severely limited in that regard), I decided to try and use Apache’s ProxyPass directive to have it serve as a proxy for requests to a Git provider. Since I’m not very familiar with Apache, it took me a while to get right, but in the end I was able to pass through only Git requests (for safety) and have Mattrbld work with them.
This means that it should become much less of a hassle to self-host a Mattrbld instance in the future (since many hosting providers still supply users with a LAMP-stack webserver)—and I’ll make sure to document the process in the official documentation.
Next Steps
And with that, we’re at the end of this devlog. As mentioned in the introduction, Mattrbld is maturing and I consider the current state nearly feature-complete for an initial release. This means that in the coming weeks, I’ll shift from adding new features to improving existing ones, cleaning things up and fixing little inconsistencies here and there.
Once that’s done, I’ll have to take a step back from coding entirely and instead write the theoretical part of my BA thesis (since Mattrbld is still my final BA project) as well as the technical documentation so others will be able to set up their own projects with Mattrbld and use it on their own.
For now, I want to tackle the Git integration of the project, which, while working fine for the moment, does not deal with conflicts well and needs an array of improvements to be truly user friendly. If I need a break from that or am done before the next devlog, I’ll also tackle the Onboarding process, which, while functional, is still looking a bit drab.
Until then, thank you for reading. I hope you enjoyed this devlog and as always, feel free to reach out over on Twitter if you have any questions or comments.
